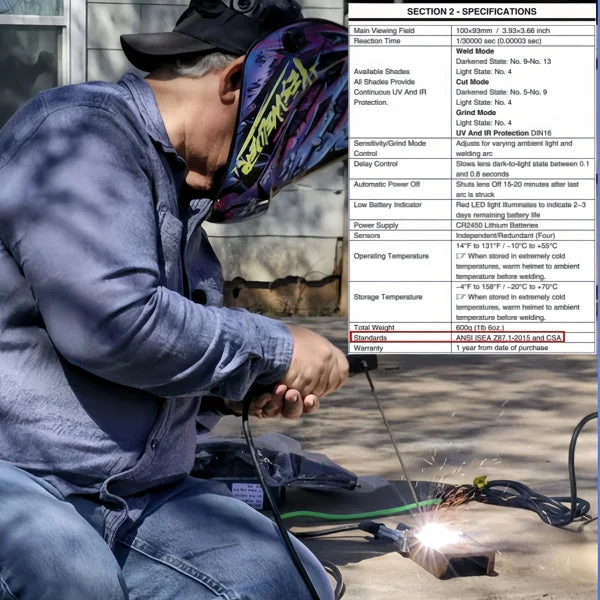
How to Choose Welding Helmets for New Orleans Events and Outdoor Demonstrations
Welding demonstrations can add an engaging, hands-on element to festivals, trade shows, maker fairs, and educational programs. However, the helmet that works well in a private workshop is not automatically the best choice for a public event. Outdoor light, changing weather, limited setup time, and close spectators all affect how welding helmets perform. For anyone planning to demonstrate fabrication in or around New Orleans, the goal is to balance reliable eye protection with comfort, visibility, ventilation, and a professional appearance. Event schedules can also help you understand the setting and timing before choosing what to bring; browse upcoming New Orleans events to compare venues, dates, and likely outdoor conditions.
When Welding Helmets Make Sense for New Orleans Events
Welding helmets are essential whenever an approved welding process creates an arc, including demonstrations involving MIG, TIG, stick, or plasma equipment. They protect against intense visible light, ultraviolet and infrared radiation, sparks, and flying particles. At a public event, a helmet also helps create a clear boundary between the operator and the work area. Spectators should never rely on the welder’s helmet for their own protection, but a properly positioned viewing screen and controlled demonstration zone can reduce exposure risks for everyone nearby.
New Orleans conditions make planning especially important. Bright sun can make an unshaded work area difficult to see, while humidity and heat can make a heavy helmet uncomfortable within minutes. If the demonstration is part of a music, arts, or maker gathering, crowds may shift throughout the day, so choose welding helmets that let you raise the shield safely between welds without losing balance or repeatedly adjusting the headgear. A compact spare helmet can also be useful when several trained operators are sharing the booth.
Key Comfort and Visibility Features to Compare
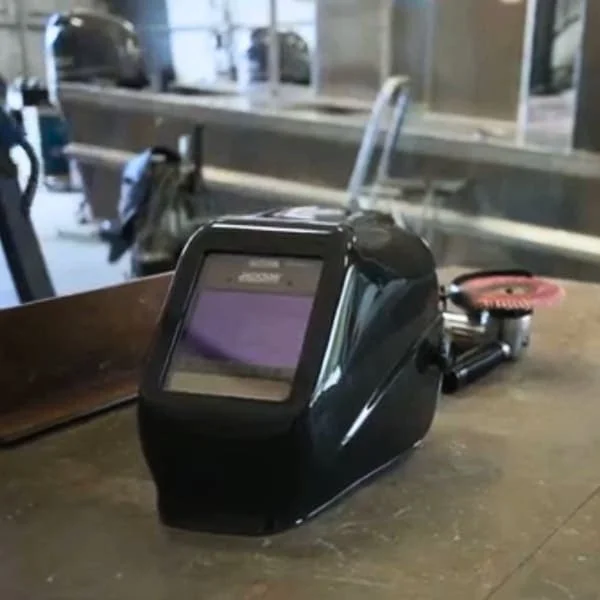
Start with fit. A helmet should sit securely without pressing painfully against the forehead, temples, or nose. Look for a smoothly adjustable ratchet or dial, a stable pivot, and a headband that distributes weight across the crown rather than concentrating it at the front. Lightweight composite shells can reduce fatigue during a full day of demonstrations, but low weight should never come at the expense of lens certification or shell durability. Try the helmet with the hood, hearing protection, respirator, or other equipment you will actually use.
Next, compare the viewing area and optical quality. A larger window can make it easier to follow a long bead or position a torch, while side windows may improve peripheral awareness if the venue permits them. Check the lens shade range, optical clarity, reaction time, and sensitivity controls. Some welders prefer a simple fixed-shade design for predictable work; others benefit from an auto darkening lens that stays clear while positioning the joint and darkens as the arc begins. Review the manufacturer’s markings rather than choosing based only on appearance.
Brand reputation can be a useful starting point, but the model’s specifications matter more than the logo. Sellstrom, ESAB, and Huntsman all offer products aimed at different work environments and budgets, so compare headgear adjustment, replacement lens availability, warranty terms, and the helmet’s stated operating range. If you are buying for occasional public demonstrations, prioritize dependable controls and replaceable parts over decorative graphics or features that will not improve the actual work.
Auto-Darkening Settings for Outdoor Demonstrations
Outdoor demonstrations are a demanding test for an auto dark system because the sensors must distinguish an active arc from strong ambient light. Before the event, test the helmet in the same general lighting conditions you expect on site. Confirm that the lens remains clear while you position the electrode or torch, then darkens promptly when the arc starts. If it darkens unexpectedly while you are preparing the joint, reduce unnecessary sensitivity or reposition the helmet so direct sunlight is not striking the sensors.
Use the shade chart for the process and amperage rather than selecting a setting by habit. A shade that is too light can provide inadequate protection, while one that is unnecessarily dark may make it difficult to see the puddle and encourage poor technique. Many helmets allow separate adjustments for sensitivity and delay. Sensitivity controls how readily the lens detects an arc; delay controls how quickly it returns to the light state after the arc stops. A short delay may suit rapid tack welding, while a longer delay can be more comfortable when bright afterglow or repeated flashes are present.
Check the batteries, solar-assist function, and low-battery indicator before leaving for the venue. Do not assume that a helmet stored in a dark case has fully charged its solar panel. Pack approved replacement batteries if the model uses them, along with a clean microfiber cloth. Scratches, dust, fingerprints, and condensation can reduce contrast and make a bright outdoor work area harder to read. Avoid using solvents that could damage the lens coatings.

Safety and Venue Considerations Before You Go
Contact the venue well before the event. Ask about permits, fire-watch requirements, electrical capacity, ventilation, fuel storage, and restrictions on open arcs or hot work. A helmet is only one part of the safety system. You may also need a fire-resistant jacket, gloves, hearing protection, appropriate footwear, screens, a fire extinguisher, a first-aid kit, and a method for isolating hot metal after the demonstration. Never weld near decorative fabrics, dry vegetation, aerosol products, or crowded walkways without a suitable separation plan.
For a popular venue or concert-adjacent demonstration, review the location’s crowd flow and load-in rules in advance. Tipitinas events, for example, can involve active entertainment spaces where equipment placement, audience sightlines, sound levels, and access routes require coordination with venue staff. Treat the helmet as part of a complete operating plan: the demonstrator should have enough room to work, spectators should remain behind barriers, and a trained person should monitor the perimeter rather than allowing the operator to manage the crowd alone.
Weather planning matters as much as equipment selection. Keep the helmet and spare lenses protected from rain, excessive heat, and direct sun when they are not in use. If the lens fogs, move to a shaded, ventilated position and follow the manufacturer’s cleaning instructions; do not continue if visibility is compromised. Wind can carry sparks toward tents or spectators, so use approved screens and reconsider the demonstration if conditions change. In humid weather, allow gear to dry fully before storing it in a sealed case.
A Practical Pre-Event Helmet Checklist
Before loading the vehicle, verify that the helmet has the correct shade range, a functioning auto darkening lens, clean sensors, secure headgear, and a clear viewing window. Test every control, inspect the shell for cracks, and confirm that replacement batteries or lens covers fit the exact model. Pack a second approved helmet if multiple trained welders will work, plus a soft case, cleaning cloth, spare protective covers, and the manufacturer’s instructions. At the venue, perform a short test weld in the final lighting and confirm that the helmet remains comfortable with all other required protective equipment.
The best welding helmets for an outdoor event are not necessarily the most expensive or feature-heavy. Choose a certified model that fits securely, provides clear optical performance, responds predictably to the arc, and can tolerate the climate and pace of the venue. Combine that helmet with thoughtful crowd control, proper screens, fire prevention, and a weather backup plan. With those details handled in advance, a welding demonstration can be both visually compelling and responsibly managed.